*Background vector created by Starline – Freepik.com*

12 Weeks of Christmas CAL 2017
#12WeeksChristmasCAL
Click HERE for all the details
Welcome to Week 11! Only one week left!
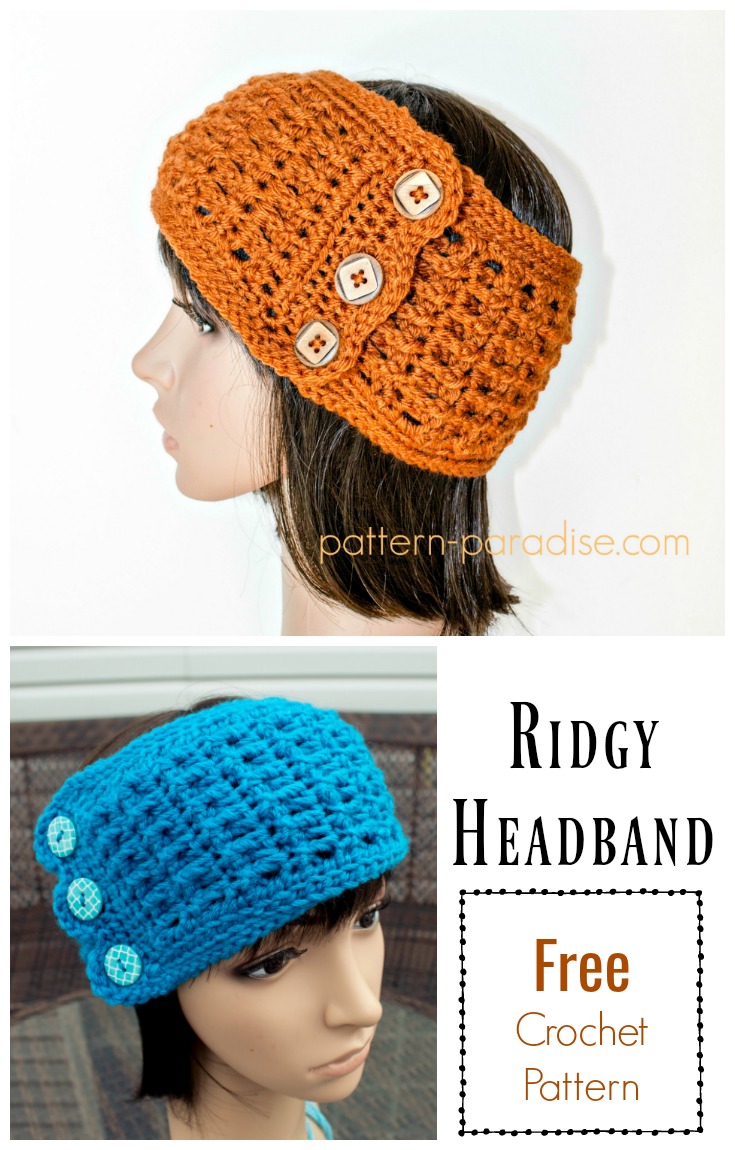
Only one more project after this one! This week we are working on the Ridgy Headband Ear Warmer. I’m not much of a hat person. I love the look of them, but they don’t look great on me so I tend to avoid them unless the weather is sub-zero! However, I do love headbands! I think they look fun and I like that they are kinder on the hair too!
The Ridgy Headband Ear Warmer is a very simple headband that is easily customized to your needs. Make it any size you like with a few simple adjustments. The stitch combination makes for a ridged texture that I like and it’s super easy to create. The border includes a scalloped end with buttonholes built in for easy on/off access, of course, if you prefer you cold sew it closed too!
Thank you to our sponsor Red Heart Yarns, for providing the yarn for this project. I used Super Saver leftovers I had from other projects. Super Saver is an old classic standby that works up well in both garments as well as items for the home. If you haven’t used it in a while, you’re in for a surprise as it comes in many solid colors, variegated, stripes and ombre and it’s softer than ever! This is truly a workhorse yarn.
FIND THE FACEBOOK “EVENT” HERE ===> http://bit.ly/2A9Wg6Z
(Must be a member of the Crochet Playgroup FB group to see the event)


~ Don’t lose it, add It To Your Ravelry Queue Or Favorites ~
~ And don’t forget to Pin It Too ~
* Purchase an ad-free PDF of this pattern on Ravelry or Craftsy*
Find all my FREE crochet patterns HERE
*******************

Instructions
Size: Child, Adult Small, Adult Medium/Large
Materials:
- Red Heart Super Saver Worsted Weight yarn, approximately 100 yards
- Stitch Markers (1)
- Hook H/5.00 mm
- 3/4″ buttons – 3 of them
- Tapestry Needle
Gauge: 14 3c x 7 rows = 4” (gauge not critical)
Abbreviations:
BLO = back loop only
BP = back post
ch(s) = chain(s)
dc= double crochet
FP = front post
hdc = half double crochet
sc = single crochet
sl st = slip stitch
st(s) = stitch(es)
Notes:
- Pattern written in US terms.
- Weave ends as you work.
- Beginning ch1 of row/round does NOT count as a stitch.
- Number in ( ) at end of round indicates the number of stitches in that round.
Pattern Instructions
Child – Head Circumference = 19″ – 21″
Adult Small – Head Circumference = 21″ – 22″
Adult Medium/Large – Head Circumference = 22″ – 23″
- To change width, increase or decrease the beginning chain in increments of two.
- To change length, increase or decrease the number of repeats.
Headband
Row 1: Ch 15, dc in 3rd ch from hook, dc in each ch to end. (13 sts throughout unless otherwise noted)
Row 2 (Right Side Row): Ch 1, turn, sc in first st, [BPsc around next st, FPsc around next st], repeat between [ ] until there is one st remaining, sc in last st.
Row 3: Ch 2 (counts as dc throughout), turn, dc in each st to end.
Repeat Rows 2 and 3 until piece measures: Child = 17”, Adult Small =18”, Adult Medium/Large = 19”).
Row 4: Ch 1, turn, sc in first st, place a stitch marker in this stitch, [BPsc around next st, FPsc around next st], repeat between [ ] until there is one st remaining, sc in last st.
Border
Join rounds with sl st in first st of round.
Round 1: This round starts in the corner and is worked around all 4 sides of the headband. To create the corners, you will work 3sc in the first and last sts of the first and last row of the headband. You will also be increasing the stitch count on each short end by 1 st in order to have even spacing for the buttonholes.
With Right Side facing you, join yarn in stitch with stitch marker, ch1, 3sc in same st (this counts as corner), 2 sc in next st, sc in each st until there is one remaining, 3sc in next st, turn to work down long side, work 2sc in the side of each dc row and 1 sc in the side of each sc row until there is one st remaining; 3sc in next st, 2sc in the next st, sc in each st until there is one remaining, 3sc in next st, work 2sc in the side of each dc row and 1 sc in the side of each sc row to end, join. (This row’s stitch count will be 12 sts along each short end + 3 sts in each corner + the sts along the long side will vary based on how long you made the headband)
Round 2: Sl st into corner st, ch1, [3sc in corner, working in back loop only, sc in each st to next corner], repeat between [ ] to end, join. (This row’s stitch count will be 14 sts along each short end + 3 sts in each corner and the sts along the long side will vary based on how long you made the headband)
Round 3 (Buttonhole Round): Sl st into corner st, ch1, 3sc in corner, sc in next st, [ch2, skip 2, sc in next 4 sts] 2 times, ch2, skip 2, sc in next st; *3sc in next corner, working in back loop only, sl st in each st to next corner*; repeat between * to end, join.
Scalloped Edge: Sl st into corner, ch1, sc in same st, sc in next st, skip 1, *work [2 hdc, 3dc, 2hdc] in next ch2 space, skip 1, sc in next 2 sts, skip 1*; repeat between * once, work [2 hdc, 3dc, 2hdc] in next ch2 space, skip 1, sc in next st, sc in corner.
Final Edge: This last round is not necessary, but it will give the headband a nice rounded edge that looks knit and prevents the edges from rolling up. Turn to work from wrong side of headband, working loosely (you may want to go up one hook size) and in the front loops only, sl st in each st all around the headband, join. Fasten off.
Sew buttons on opposite end being sure to line them up with the buttonholes.
Don’t forget to PIN IT for later!
Weekly Giveaway!
Be sure to link your project up on Ravelry
and enter the Rafflecopter below for a chance to win the weekly prize package!
Valid in US, Canada and Mexico, void where prohibited by law.
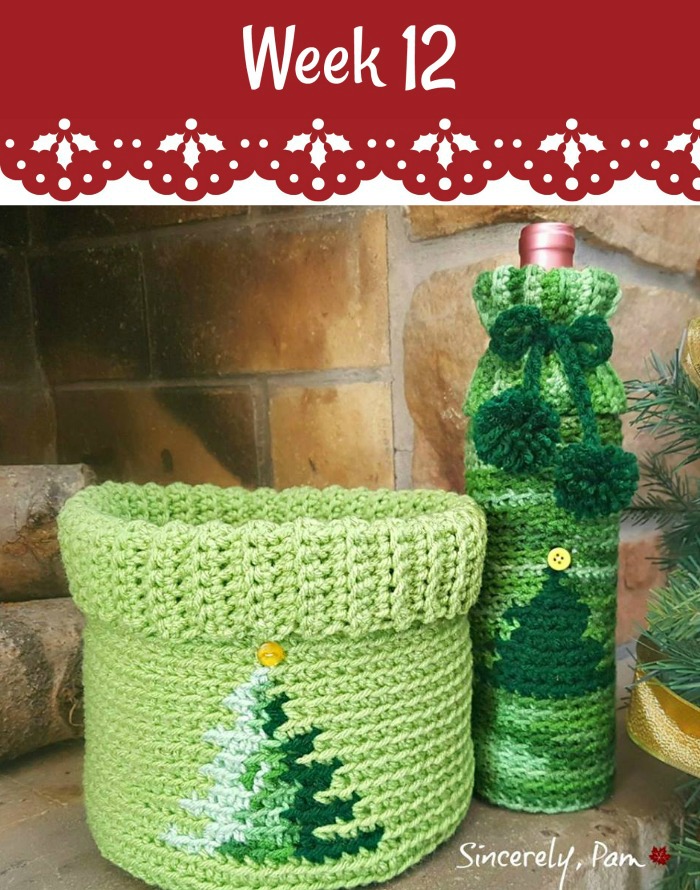
Here’s a preview of next week’s pattern
Courtesy of Sincerely, Pam!
***********
What do you have to do? It’s Easy!
- Join our Crochet Playground FB Group so you can keep up with all the happenings. There will be a pinned post in the group, where you will go to get info, stay in touch, get/give help and share your progress with your fellow crocheters.
- Subscribe to our blogs and follow us on social media so you won’t miss anything.
- Wait for the list of suggested materials to be announced on September 1st.
- When your CAL project is complete, simply create a Ravelry project and link it to the pattern page. If you need help with this, my friend Rhondda has an easy tutorial HERE to help you out. Projects must be linked by midnight (eastern time) each Thursday and the winner will be selected and announced each Friday. Of course, we’d love you to post your pictures to the FB group too because we love to ooh and ahh over our friends 🙂
- Finally, don’t forget to enter the Rafflecopter link for the weekly giveaway.
We want to share the event with the world, so be sure to tag your posts and pictures with #12WeeksChristmasCAL so that we can be easily found in social media!
That’s it! Easy, breezy and lots of fun!
Schedule:
- 9/1 – Materials List Released
- 9/15 – Week #1 hosted by Pattern Paradise – Frosty Placemat
- 9/22 – Week #2 hosted by Oombawka Design – Peace on Earth Angel
- 9/29 – Week #3 hosted by Pattern Paradise – Dreamy Scarf
- 10/6 – Week #4 hosted byThe Purple Poncho – Holly Berry Stocking
- 10/13 – Week #5 hosted by Pattern Paradise – Dreamy Hat
- 10/20 – Week #6 hosted by A Crocheted Simplicity – Gingerbread Man Hot Pad
- 10/27 – Week #7 hosted by Pattern Paradise – Mysteria Wrap
- 11/3 – Week #8 hosted by The Stitchin’ Mommy – Holiday Striped Pillow
- 11/10 – Week #9 hosted by Pattern Paradise – Down the Chimney Gift Bags
- 11/17 – Week #10 hosted by Snappy Tots – Frosty Luminary
- 11/24 – Week #11 hosted by Pattern Paradise – Ridgy Headband
- 12/1 – Week #12 hosted by Sincerely, Pam
- 12/15 – Grand Prize Winner Announced!
Click below for prior events!
Be Social!
Click the logos below to learn more about my guest hosts,
and follow them on social media!

-

- Carolyn
-

- Jennifer
-

- Amy
-

- Heidi
-

- Pam
************************************************************************************************
I can't wait to see your finished projects,
so feel free to share them on my Facebook page!
Follow me on…


Sign up for my newsletter and get free patterns, giveaways and
other fun stuff delivered directly to your mailbox!

****************************************************************
I’m always happy to help you with questions regarding my patterns. Send me a message and I'll get back to you as soon as possible. Please feel free to sell finished items from my patterns. Pattern credit is not required, but is always appreciated.
Copyright © 2023 Pattern Paradise. All rights reserved. No part of this publication may be reproduced, distributed, or transmitted in any form or by any means, including photocopying, recording, or other electronic or mechanical methods, without the prior written permission of the publisher.


Leave a Reply