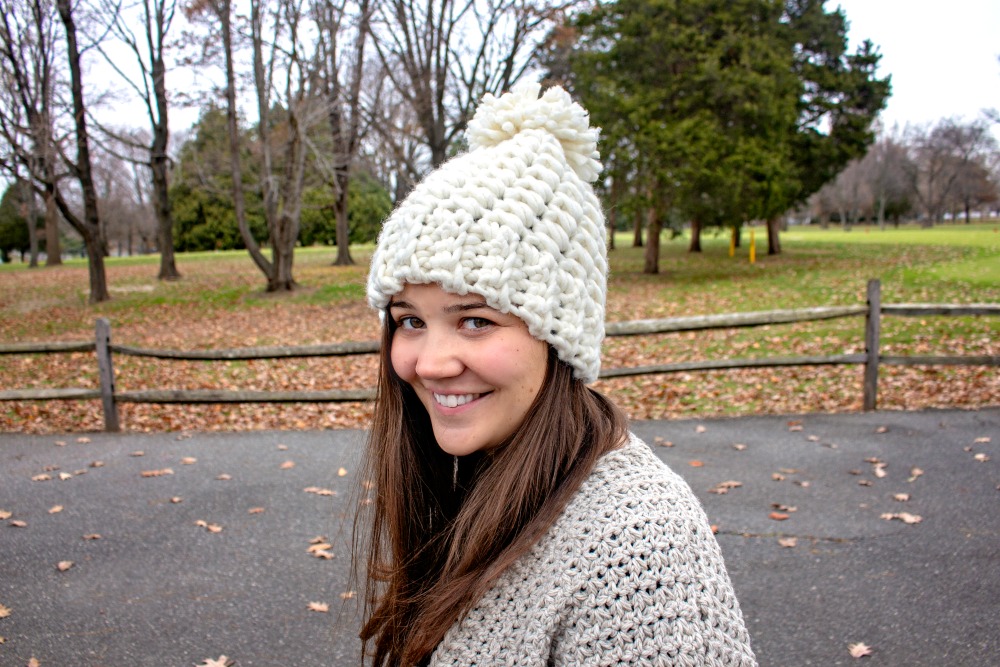
Snowdrift Hat
The Snowdrift Hat is a quick and easy crochet project if you use a super bulky yarn like I did, but you can actually follow my “recipe” and use any kind of yarn (with the appropriate hook, of course) and make any size you like. If you like pompoms, I use this tutorial to make mine.
I hope you enjoy making it and will share your finished pictures on my Facebook page.

Snowdrift Hat
Scroll down for the free pattern
~or~
Purchase an ad-free PDF version on Ravelry
And don’t forget to Pin It Too
Find all my FREE crochet patterns HERE
Snowdrift Hat
Size: Instructions written for Adult (20″ – 23″), but you can make any size you like.
Materials:
- Super Bulky, I used Red Heart An Italian Story Ora – 2 skeins
- Hook 12.00 mm
- Yarn needle for weaving ends
Did you know I have a shop on Amazon featuring some of my favorite tools and gadgets? Click the link below to visit my shop and get your supplies, at great prices, fast and easy.
Gauge: see notes in pattern
Abbreviations (US Terms):
BLO – back loop only
ch – chain
sc – single crochet
sl st(s) – slip stitch(es)
st(s) – stitch(es)
Notes:
- Beginning ch 1 of round does not count as a stitch.
- Join rounds with a slip stitch in the first stitch.
- Start each round in the same stitch as join.
- Number in ( ) at end of round indicates the number of stitches in that round.
Band:
Row 1: Ch5, sc in 2nd ch from hook and each remaining ch to end. (4)
Row 2: Ch1 (does not count as st throughout), turn working BLO, sc in each st to end. (4)
Repeat Row 2 until band measures 21” (flat) or desired head circumference.
Match two short ends (there is no right or wrong side to this band) together and working through both loops on one side and back loop on the other, sl st through both thicknesses to join into a circle.
Body:
Round 1: Turn to work along rows of band, work an even number of sc evenly around (I worked 32), join. (32)
Round 2: Ch1, *skip next st, sc in next st, working over sc just made, sc in skipped st*, repeat between * to end, join. (32)
Repeat Round 2 until hat measures desired length, mine is 11”. Fasten off leaving a 12” tail.
Use the 12” tail to weave in and out of every other stitch in the last round, pull tightly to close opening, secure in place.
Add a pompom if desired.

If you love hats, AllFreeCrochet.Com has lots of free patterns for you too!


************************************************************************************************
I can’t wait to see your finished projects,
so feel free to share them on my Facebook page!
Follow me on…


Sign up for my newsletter and get free patterns, giveaways and
other fun stuff delivered directly to your mailbox!
CLICK HERE
****************************************************************
I’m always happy to help you with questions regarding my patterns. Send me a message and I’ll get back to you as soon as possible. Please feel free to sell finished items from my patterns. Pattern credit is not required, but is always appreciated.
Copyright © 2018 Pattern Paradise. All rights reserved. No part of this publication may be reproduced, distributed, or transmitted in any form or by any means, including photocopying, recording, or other electronic or mechanical methods, without the prior written permission of the publisher.

Affiliate Links:

I can't wait to see your finished projects,
so feel free to share them on my Facebook page!
Follow me on…
Sign up for my newsletter and get free patterns, giveaways and
other fun stuff delivered directly to your mailbox!
****************************************************************
I’m always happy to help you with questions regarding my patterns. Send me a message and I'll get back to you as soon as possible. Please feel free to sell finished items from my patterns. Pattern credit is not required, but is always appreciated.
Copyright © 2023 Pattern Paradise. All rights reserved. No part of this publication may be reproduced, distributed, or transmitted in any form or by any means, including photocopying, recording, or other electronic or mechanical methods, without the prior written permission of the publisher.


Hi!! How do you attach the band to the body of the hat?? Thanks!!
You don’t “attach” it exactly, you simply join the band to make a circle, then work around the sides of the rows of the band and continue working the hat upward.